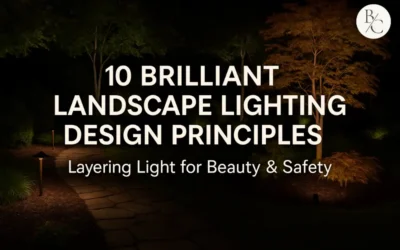
Picture this: It’s a warm evening in Mt. Juliet. Fireflies dance over the lawn, a light breeze nudges the wind chimes, and your home glows like something out of a magazine spread. Is that scene pure magic—or carefully planned lighting? Here’s the kicker… it’s both. A professional designer layered multiple types of light and lighting design, so every tree, path, and patio feel both beautiful and safe. Intrigued? Let’s dive into how layering light can transform your yard.
Why One Light Isn’t Enough
Pop a single floodlight on the garage and you’ll see the driveway, sure—but everything else disappears into harsh shadows. Layered lighting swaps that stark “spotlight” feel for a balanced glow. By combining ambient, task, and accent fixtures, pros create warmth, eliminate trip hazards, and reveal your landscape’s best angles. The result is a yard that welcomes guests, discourages intruders, and beckons you outside long after sunset.
The Three Essential Layers
1. Ambient Lighting
Think of ambient light as the moonlight you control. Soft washes from downlights in tall trees, subtle sconces on the porch, or low‑glare wall‑wash fixtures all add a gentle background glow. Nothing feels blinding; nothing feels forgotten. This base layer sets the mood, making a patio feel cozy rather than cavernous.
2. Task Lighting
Now we get practical. Task fixtures aim light exactly where you need to do something—walking to the firepit, finding the keyhole, or reading a book on the porch swing. Path lights, step lights, and entry fixtures keep feet sure and fingers safe. Because task beams are focused, they prevent both stubbed toes and wasted energy.
3. Accent Lighting
Ready for drama? Accent lights spotlight the elements you love most: that mature red maple, the stone fountain, the perfect pergola. Uplights, grazing fixtures, even an artful backlight can make a simple shrub look sculptural. Accent beams add depth, guide the eye, and lend your home the “wow” factor neighbors notice from the street.
Design Principles for a Cohesive Glow
Balance Is Everything
Layered lighting should feel seamless. If one zone blinds while another fades, the spell breaks. Pros use lumen output, beam angles, and fixture placement to keep brightness even. They’ll often begin with ambient washes, then dial in task beams, and finally sprinkle accents—stepping back between each tweak to gauge harmony.
Control Glare Before It Starts
Glare is the enemy of comfort. Designers angle fixtures away from sightlines, tuck hardware behind shrubs, or choose shielded optics so light kisses surfaces instead of attacking eyes. Great lighting lets you see the bulbs? Um, no thanks. Great lighting lets you see because of the bulbs.
Temperature Sets the Tone
Color temperature shapes emotion. Warm (2700 K) hues feel inviting around seating areas and front entries. Cooler (3000–3500 K) whites sharpen stone textures or modern facades. Mix sparingly; too many temps can feel chaotic. Most Mt. Juliet homes settle on warm for living zones, reserving slightly cooler beams for security spots.
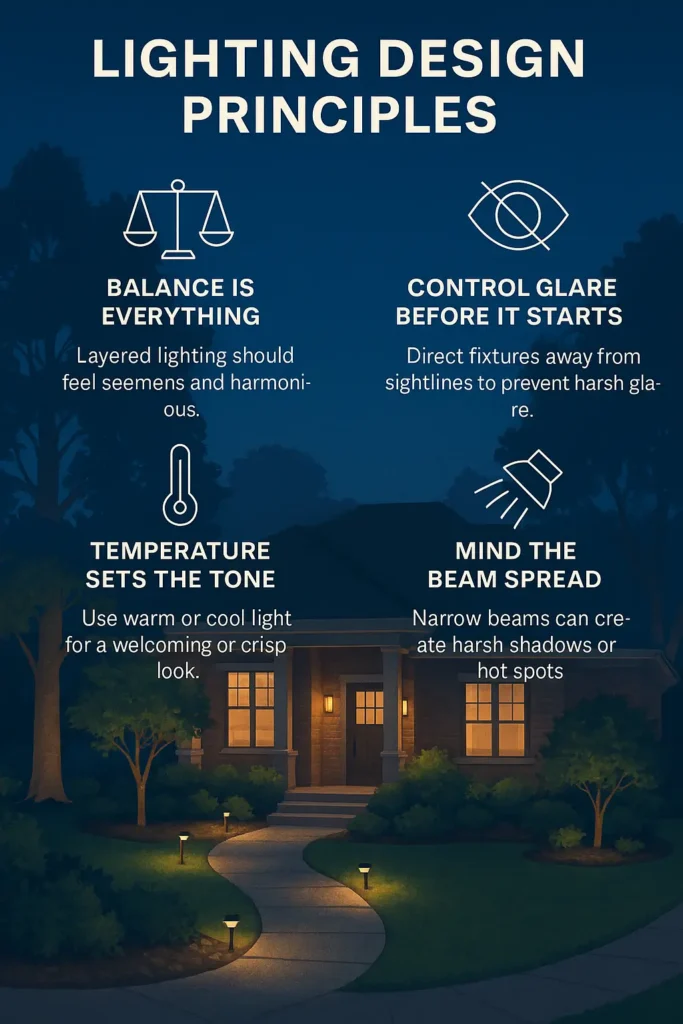
Mind the Beam Spread
A narrow spot accentuates a statue; a wide flood paints a garden wall. Pros match beam angles to each target so leaves shimmer but walls glow evenly. They also adjust fixture distance—too close and you get a hot spot, too far and the subject sits in shadow. Tiny shifts make huge visual differences.
Layer by Zone
Front yards deserve nighttime curb appeal and clear house‑numbers. Backyards lean toward hospitality, guiding folks to decks, fire features, or pools. Side paths and gates focus on security. A designer builds each zone separately, then stitches them together so walking from driveway to patio feels like one cohesive experience.
Key Techniques in Professional Hands
Path Lighting
Short posts with mushroom‑style caps or sleek modern domes cast gentle halos on walkways. Spaced six to eight feet apart, they outline curves without an airport‑runway vibe. In damp Tennessee winters, these guides keep mud at bay and save that new pair of boots.
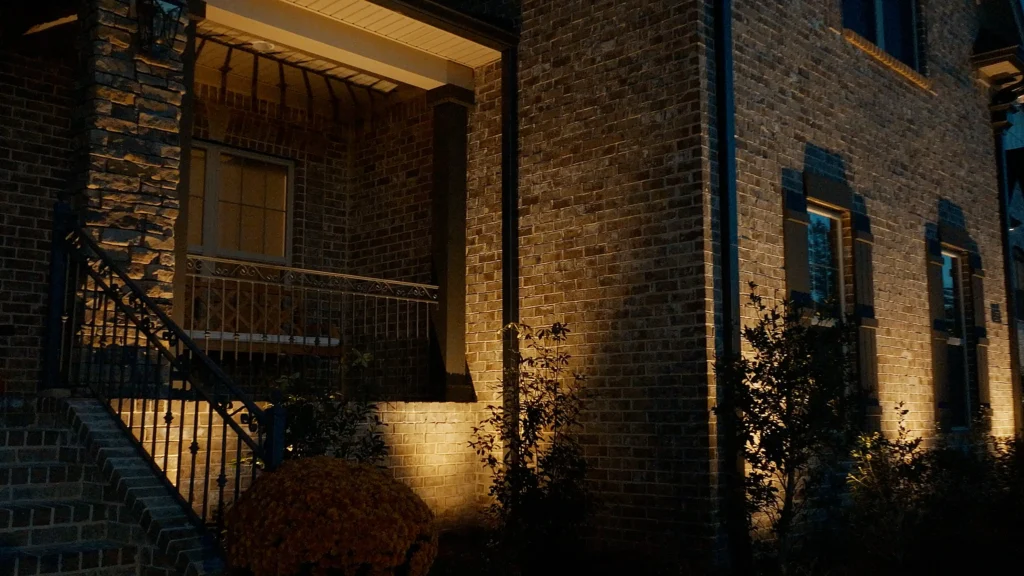
Uplighting
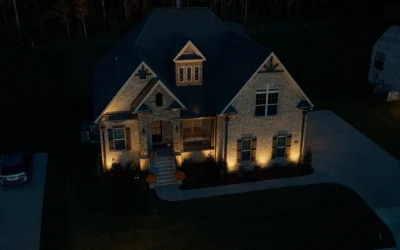
Fixtures tucked at ground level shoot light upward, turning tree trunks into columns and canopies into fluttering ceilings. On brick façades, uplights reveal rich textures the sun hides. Just two or three can make a simple ranch home look stately after dark.
Downlighting (a.k.a. Moonlighting)
By mounting fixtures high in mature oaks or porch rafters, pros mimic natural moonbeams. Light filters through branches, scattering soft, shifting patterns on patios. Guests rarely spot the fixtures—only the enchanting glow they cast.
Grazing
Placing a low fixture inches from a stone or cedar wall skims light across every ridge and groove. The play of highlight and shadow turns ordinary siding into dramatic art, especially near front entries where first impressions count.
Silhouetting and Shadowing
A hidden light behind a small tree projects its outline onto a fence or façade—simple, striking, and energy‑smart. Conversely, placing the light in front can throw a dramatic larger‑than‑life shadow onto the surface behind it. Either way, you’ve added depth without extra hardware.
Deck and Step Lights
Tiny recessed dots under stair treads or along railings make nighttime barbecues safer. They also trace architectural lines, accenting craftsmanship you invested in. Bonus: step lights ward off that dreaded “ankle‑twist” call to the medic.
Water Feature Illumination
Submersible LEDs can give fountains a crystalline sparkle, while a single spotlight grazing the ripples of a pond creates hypnotic reflections on nearby foliage. Just remember: electricity and water demand professional wiring expertise—no cutting corners here.
Smarter Controls, Safer Nights
Layered lighting isn’t just about where fixtures go; it’s about when they work. Pros often:
- Install Astronomical Timers that adjust on/off times automatically with seasons.
- Use Motion Sensors near gates or driveways to pop on brighter security beams only when needed.
- Connect to Smart Home Hubs so homeowners dim or color‑tune zones from a phone—perfect for party nights or quiet, stargazing evenings.
These controls save energy, prolong bulb life, and let you fine‑tune ambiance with a swipe.
The Professional Lighting Process in Mt. Juliet
- Consultation – A designer walks your property at dusk, noting sightlines, focal points, and safety concerns. They’ll ask how you entertain and what features you adore—maybe that hand‑carved porch swing or prized Japanese maple.
- Concept Plan – You’ll review a sketch or 3‑D rendering showing fixture types, beam spreads, and control zones. Little tweaks happen here so installation day runs smooth.
- Installation – Certified crews trench low‑voltage cable, set durable brass or stainless fixtures, hide transformers, and program timers. You sit back and watch your yard transition from dark to dazzling.
- Night Aim Session – After sunset, the designer returns to fine‑tune angles and brightness. A nudge here, a swap there… suddenly each leaf glistens just right.
- Maintenance & Upkeep – Many companies offer seasonal check‑ups: cleaning lenses, trimming plants, and verifying all transformers sync. Peace of mind included.
Long‑Term Payoffs
- Curb Appeal: A layered design can boost property value and speed up resale—buyers remember “that gorgeous house with the glowing trees.”
- Outdoor Living: Soft, even light expands your usable square footage. Suddenly the patio is dinner table number two, and kids’ games last past bedtime.
- Security: Well‑lit doors, paths, and corners deter intruders better than a single blinding floodlight. Balanced light removes hiding spots without irritating neighbors.
- Energy Efficiency: LED fixtures sip power; most systems run for pennies per night. Layering lets you dim or turn off zones you’re not using, saving more.
- Neighborhood Pride: Let’s be honest—there’s a little thrill when the mail carrier compliments your evening landscape. Beauty shared spreads good vibes street‑wide.
Frequently Asked Questions
Q: Will low‑voltage lighting be bright enough?
A: Absolutely. Modern LEDs deliver impressive lumens while staying energy‑smart. By layering multiple fixtures, pros achieve brightness where you need it without glare.
Q: How long do LED landscape bulbs last?
A: Many last 30,000–50,000 hours—that’s years of nightly use. Quality fixtures also sport weather‑sealed housings, shrugging off Tennessee rain and humidity.
Q: Can I add more lights later?
A: Yes. Designers typically oversize transformers and leave expansion loops in conduit. When you build that new pergola, adding a zone is quick and clean.
Q: Do I need permits for professional lighting?
A: Low‑voltage systems usually bypass permitting, but licensed installers still follow electrical code and safety best practices. High‑voltage features, if any, may require inspection.
Q: How soon will I see a return on investment?
A: While exact figures vary, homeowners report increased enjoyment immediately and higher buyer interest if listing the house later. Plus, safety benefits pay dividends every night you walk a lit path instead of fumbling in the dark.
Bring Your Nightscape to Life
Layered landscape lighting is like symphonic music: each instrument has a role, but together they deliver goosebumps. By hiring a Mt. Juliet professional, you’ll get a customized score—one that highlights favorite trees, escorts guests safely to the door, and sets a welcoming glow against Tennessee sunsets.
Ready to see your home in a whole new light? Reach out to a local lighting design expert, schedule a dusk consultation, and watch beauty and safety blend the moment darkness falls. Your yard’s next act starts tonight.