Ever stroll past a home in the evening that looks straight out of a fairy tale?
The garden is aglow, the pathway sparkles gently, and the trees cast enchanting shadows. You can’t help but slow down and admire it. Now, imagine coming home to your house looking just as magical every night. Sounds dreamy, right?
That’s the power of well-planned landscape lighting. It can turn a dark, uninviting yard into a warm and welcoming outdoor retreat. If you’re a homeowner curious about how to brighten up your outdoor spaces after sunset, stick around – this guide will shine a light (pun intended) on everything you need to know.
What is Landscape Lighting and Why Does It Matter?
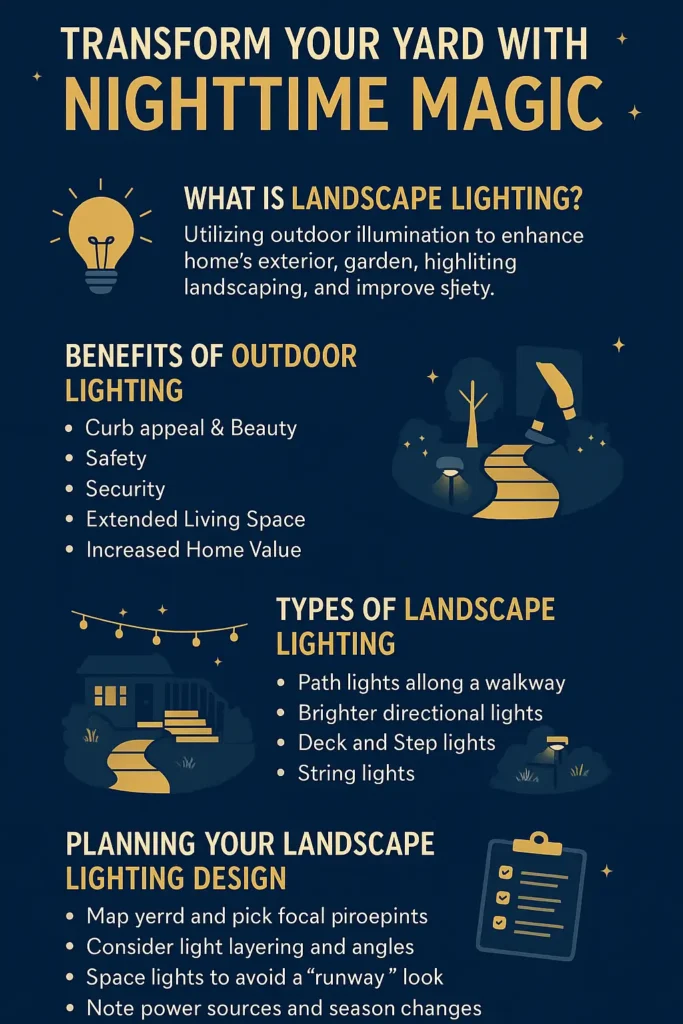
Landscape lighting is more than just a few lights scattered in the yard. It’s the art of using outdoor illumination to enhance your home’s exterior, highlight your landscaping, and improve safety after dark. Think of it as decorating with light. When done right, landscape lighting creates an atmosphere that makes you want to spend more time outside and shows off your home’s best features even at night.
Why should you care?
Here’s the kicker: not only does good lighting make your property look stunning, but it also serves practical purposes. It deters intruders by eliminating dark hiding spots and prevents you (or guests) from tripping on that garden hose you forgot to roll up. In short, landscape lighting marries beauty and function – you’ll love how it looks, and you’ll feel more secure too.
Benefits of Adding Outdoor Lighting
- Curb Appeal & Beauty: A well-lit front yard and garden look absolutely charming after dark. Soft uplights can make a tree look like a piece of art, and subtle lights along a walkway create a welcoming glow. Your home’s architectural details – that stone facade or those columns – suddenly stand out even at night, impressing visitors and potential buyers.
- Safety: Ever missed a step on your porch at night? Ouch. Proper lighting on pathways, steps, and driveways helps prevent accidents. You’ll clearly see where you’re walking – no more fumbling through the dark or worrying about guests stumbling on the way to your door.
- Security: A dark yard can attract unwanted critters or even intruders. But wait… a lit-up yard is far less inviting for prowlers. Landscape lighting can work like a gentle security system, eliminating the cover of darkness that thieves prefer. Motion-activated lights or just consistent low-level illumination can make a big difference in securing your property.
- Extended Living Space: With pleasant lighting, your patio or backyard becomes an extra living room. You’ll host BBQs or enjoy summer evenings outside without sitting in total darkness. Outdoor string lights over a patio, for example, create a cozy ambiance that encourages people to gather and linger.
- Increased Home Value: While you shouldn’t expect a dollar-for-dollar return on every light fixture, great lighting does boost perceived value. It shows that you care for and have invested in your property. Some real estate experts say that attractive outdoor lighting can even help a home sell faster by making that crucial first impression at night really count.
Types of Landscape Lighting (Find the Right Lights)
When we talk about landscape lighting, it’s not one-size-fits-all. There are various types of light fixtures and techniques, each serving a unique purpose. Knowing the options will help you choose the right lights for different spots around your yard. Here are some popular landscape lighting types:
Path Lights
These are those short stake lights that line walkways, garden paths, or driveways. Path lights typically have a cap on top that directs light downward in a circular spread. They’re perfect for illuminating pathways so you (and your guests) can see where to step. Beyond function, they also add a fairytale-like charm, almost like runway lights guiding your home. You’ll want to space them out (usually every few feet) so the light pools gently overlap without creating one continuous glare. The result? A safe path that looks inviting, not like an airport runway.
Spotlights and Uplights
Spotlights (also called uplights when aimed upward) are brighter directional lights that highlight specific features. Do you have a majestic tree, a beautiful statue, or a textured stone wall you love? A spotlight can showcase those features even in the dark. By aiming a spotlight upward at, say, your oak tree, you’ll see the branches and leaves beautifully silhouetted against the night sky.
Many homeowners use uplighting for trees or the front of their house to give it that dramatic, elegant look. Aim them carefully and tuck the fixtures behind shrubs or rocks if you can, so you see the glow without seeing the bulb – it’s more magical that way.
Many homeowners use uplighting for trees or a home’s facade to add depth and drama. Here’s the kicker: a few well-placed lights can have a more dramatic effect than dozens of poorly placed ones. So pick your focal points and let them shine.
Deck and Step Lights
Have a deck, porch, or some stairs outdoors? Deck and step lights are made for those. These are usually small fixtures installed on vertical surfaces – like the side of steps, on posts, or under railings. They cast light downwards to safely light up stairs or edges so nobody misses a step. On a deck, you might see them mounted on posts to shine down onto the floor.
They’re subtle but super effective. When spaced along every few steps or around the perimeter of a patio, they not only prevent accidents but also create a neat glowing outline of your outdoor hangout spot. Plus, they add a high-end touch – think of the soft lighting at a nice resort, guiding you along paths and steps in the evening.
String Lights and Hanging Lights
For pure atmosphere, string lights are a favorite. These are the dangling lights (like cafe or bistro lights) you might drape over a patio, along a fence, or through a pergola. They’re not about intense illumination; they’re about ambiance. Imagine sitting under a canopy of softly twinkling lights – it’s like your own little outdoor living room with a ceiling of stars. String lights are easy to install and instantly make a space feel festive and cozy.
Besides strings, there are also hanging lanterns or pendant lights designed for outdoor use, which you can hang from tree branches or shepherd’s hooks to create pools of light in a seating area or garden nook. Just make sure any lights you use outside are rated for outdoor use (weather-proof), so they shine on through the seasons.
Other Accent Lights
There are a few more nifty types of lights worth mentioning. Wall wash lights are similar to floodlights but generally less bright and placed close to a wall or hedge; they spread light evenly to wash that surface with a gentle glow (great for showing off a stone veneer or an ivy-covered wall).
Well lights are fixtures recessed into the ground so that the light shines upward without any fixture sticking out – perfect for a clean look when uplighting trees or walls. And don’t forget pond or pool lights if you have water features. Submersible lights can make your backyard pond look like a mystical lagoon at night or give your swimming pool a resort-like glow.
As you can see, there’s a landscape light for every purpose!
Planning Your Landscape Lighting Design
Before you rush out and buy a bunch of lights, it pays to do a bit of planning. A thoughtful design will save you time and money, and the end result will look much better than a hodgepodge of random lights. Here’s how to plan like a pro:
Map out your yard (on paper or in your head): Walk around your property at night and note the dark areas and features you want to highlight. Maybe it’s that front walkway, the big maple tree, the flowerbed, or your house’s entryway. Sketch a simple map of your yard and mark where structures, plants, and existing outdoor power outlets are. This map will help you decide how many lights you need and where to place them.
Pick your focal points: Less is more when it comes to accenting features. Choose a few key things you want to illuminate rather than everything. For instance, highlighting one beautiful tree in the front yard can make a bigger statement than lighting ten smaller shrubs. Think about what you want eyes to be drawn to. Is it your front door? An oak tree? A garden statue? Plan to give those stars the spotlight (literally).
Consider light layering and angles: Professionals often talk about layering light, which means using a mix of different lights and angles for a natural look. In practical terms, that could mean you use path lights low to the ground along a walkway (lighting the ground), and also use a couple of downlights in a tree (casting a soft glow from above like moonlight). The combination adds depth and reduces harsh shadows.
Play with angles too: try to position lights so they highlight textures (like the rough bark of a tree or the interesting shape of a cactus) and avoid shining directly into people’s eyes or windows (no one likes glare).
Spacing and placement: You’ll want to avoid the “runway effect” of lights placed too close. As a rule of thumb, space path lights about 6 to 10 feet apart, depending on how bright they are and the look you want. You want overlapping glows, not a continuous overly bright line.
For spotlights, place them a few feet back from what you’re lighting for a softer focus (e.g., a spotlight at the base of a wall or tree, aimed upward). If you put a light right at the base of a wall, you’ll get a narrow hot spot of light; moving it back lets the beam spread out more. Don’t be afraid to experiment — place your lights, then check at night and adjust as needed.
Power sources & practicality: Take note of where you can get power. Most landscape lighting systems run on low-voltage electricity from a transformer plugged into a standard outlet. Plan to mount the transformer near that outlet and run wiring out to your lights. If the area you want lit is far from the house with no outlet nearby, you might consider solar lights there (since they don’t need wiring). Solar lights are easy to place anywhere the sun hits, though they often aren’t as bright as wired lights.
Also consider if you want to put any lights on timers or smart controls – it’s great when they automatically turn on at dusk. If so, factor in space for those controllers or smart bulbs. For example, you might use a transformer with a built-in timer or a smart plug for your transformer to integrate your lights with a home automation system.
Plan for the seasons: Think about how your yard changes throughout the year. Do deciduous trees that lose leaves mean an area is darker in summer but bare in winter? Perhaps that’s when evergreens or architectural features become your focal points. Also consider seasonal use: maybe you host more outdoor parties in summer, or you want a festive vibe around the holidays.
Ensure your lighting plan is flexible or broad enough to adapt. For instance, you could include a couple of extra outlets in your design for plugging in seasonal decorations like string lights or inflatables when the time comes.
By mapping things out and thinking through these points, you’re less likely to end up with “light clutter” or dark spots you didn’t anticipate. A little planning goes a long way toward a cohesive, beautiful landscape lighting setup.
Landscape Lighting Ideas for Different Areas
Every part of your yard can benefit from a light touch (pun intended), but the approach can differ by area. Let’s break it down by front yard, backyard, and those important pathways and driveways. This way, you’ll get ideas tailored to each space.
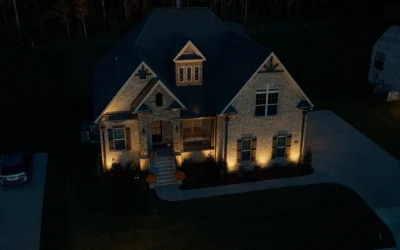
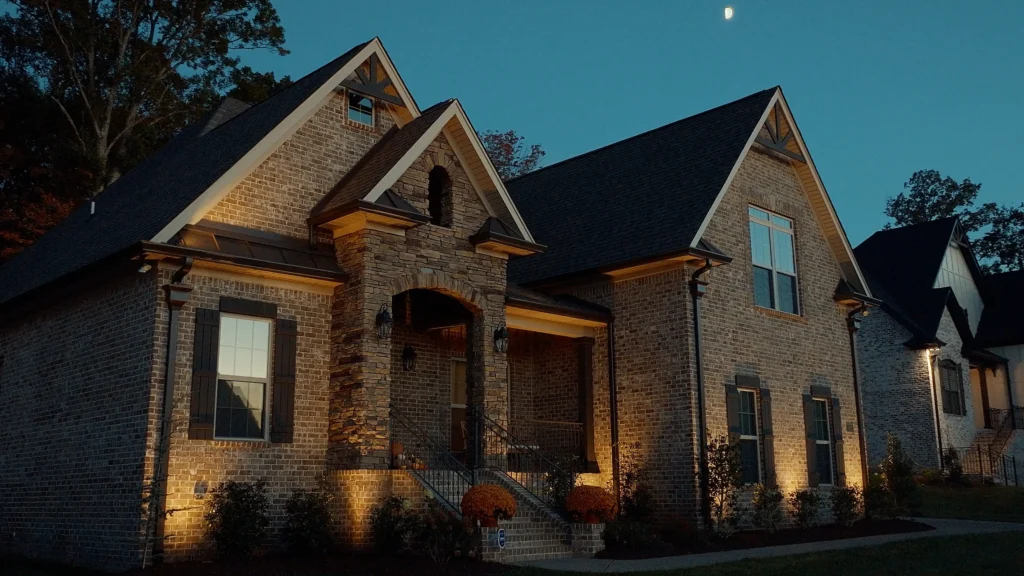
Front Yard and Entryway
The front of your home is all about first impressions and curb appeal. Here, landscape lighting serves both beauty and function. A common approach is to use uplights (small spotlights) to highlight the front facade of your house. For example, if you have brick or stone walls, or interesting columns or eaves, placing a couple of spotlights a few feet from the foundation and aiming up can accentuate that texture and architecture. It gives your home a stately, welcoming appearance, almost like it’s saying “hello” to visitors even at night.
Next, think about your entryway and porch. A well-lit front door area not only looks inviting but also makes it easier to find your keys! You might already have a porch light, but you can enhance this with landscape lights. Try adding a couple of path lights along the walkway leading to your door. Space them out so there aren’t any dark gaps or overlapping bright spots. If you have steps or a porch, those deck/step lights we talked about are fantastic to install along the risers or under railings. They’ll make sure no one trips on the way in.
Don’t forget the driveway if you have one out front. You can line the edges of a driveway with sturdy path lights or even in-ground well lights. This not only helps guide your car in after sunset but also adds a sophisticated look, almost like a runway (just remember not to overdo it; you want gentle guidance, not a blinding landing strip).
For long driveways, you could also use downlighting by mounting a light on a tree or pole to cast light over the drive without having too many fixtures on the ground. This approach provides plenty of light without requiring a long row of fixtures along the whole drive, keeping the look natural.
The key in front yards is symmetry and subtlety. Use similar fixtures on either side of a focal point (like one on each side of the front door, or balanced on either end of a flower bed) to create a pleasing balance. You’ll know you’ve got it right when the lights accent your home’s features without overpowering them.
Backyard and Patio
In the backyard, the focus often shifts to relaxation and entertainment. This is your private space to unwind or host friends, so you can get a little creative and cozy with the lighting. A popular idea is string lights (those cafe-style bulbs or fairy lights) zigzagged over a patio or hung in a pergola. They cast a warm, gentle illumination that’s perfect for dinner parties or just sipping lemonade on a summer night. If you have trees around your patio, you can even string lights between trees, creating an outdoor “ceiling” of light.
For patios and decks, combine those overhead string lights with some ground-level or eye-level lighting. For instance, use deck lights on posts or railings to outline the perimeter of your deck. Around the edges of the yard, say along a fence or at the back of a flower bed, you can place a few accent lights to showcase tall ornamental grasses, a water fountain, or a statue. This gives depth to the view, so you’re not just lit on the patio with pitch darkness beyond – you see a pleasant yard beyond the immediate area.
Another cool idea: moonlighting. This is a technique where you place lights up in a tree, angled downward, so they cast a diffuse glow, much like real moonlight. If you have a big tree over a patio or lawn, a downlight or two up in the branches can create a beautiful dappled effect (shadows of leaves will dance on the ground, it’s lovely!). It’s subtle and natural-looking, unlike the sometimes harsher look of upward spotlights.
Also consider functional lighting if you have features like a hot tub, pool, or outdoor kitchen. For a pool, underwater LED pool lights come in various colors and can make nighttime swims feel like a resort experience. For a grill or outdoor kitchen, you might want a brighter task light – perhaps a focused downlight mounted on an eave or nearby wall, so the grill master can see the food. These functional backyard lights ensure the backyard isn’t just pretty, but also usable for all your activities.
Pathways and Driveways
We touched on this a bit in the front yard section, but let’s talk generally about paths and driveways anywhere on your property. Pathways need consistent, gentle lighting to be safe. If you have a garden path in the backyard leading to, say, a gazebo or a vegetable patch, line it with path lights or even small solar stake lights. The goal is to mark the path clearly and ensure visibility without over-illumination.
You’d be surprised how little light you actually need once your eyes adjust at night – often just a 1-watt or 2-watt LED in each path light is enough to create a nice glow on the ground. This approach provides plenty of light without requiring a long row of fixtures along the whole path, keeping the look natural.
For driveways, especially long ones, you have a couple of options. One is placing path lights along the edges (just be sure they’re sturdy or set back enough that they won’t get run over or hit by the snow shovel). Another option, as mentioned, is downlighting from nearby trees to cast light over the drive. This can light the drive with fewer fixtures, and it often looks more natural – like having a gentle streetlamp effect without the actual streetlamp pole.
If security is a concern on a driveway (maybe you live in a darker area or want to deter wildlife), you could integrate a motion-activated light near the garage or gate that turns on when something approaches. This way, you can enjoy a modest level of light under normal conditions, but get brighter illumination when needed for security or specific tasks.
Installation: How to Install Landscape Lighting
So you’ve picked out your lights and have a game plan – now, how do you actually install these things? The good news is that most landscape lighting is low-voltage (12 volts), which is way safer to work with than standard household 120-volt power. Low-voltage systems don’t require you to be an electrician or get special permits.
You’ll use a transformer that plugs into a regular outdoor outlet to step down the power. (Important: make sure that outlet is GFCI-protected for safety, which most outdoor outlets are by code.) If all this sounds a bit technical… um, don’t worry, it’s easier than it sounds. Let’s break it down step by step.
Step-by-Step Installation Guide (Low-Voltage Lights)
Mount the transformer: Find an exterior outlet (ideally one with a weatherproof cover) and mount your transformer box to the wall near it, about a foot above the ground. Screw it in securely. Don’t plug it in yet.
Lay out the lights and cable: Place your light fixtures roughly where you want them in the yard. Leave the stakes out of the ground for now so you can adjust placement easily. Unroll your low-voltage cable and run it from the transformer location out to each light (lay it on top of the ground along the planned route). It’s okay if you have extra cable slack – you can trim or bury it later.
Connect the lights: Most landscape lights have easy connectors that clamp onto the main cable. Attach each fixture’s connector to the low-voltage cable where that light is positioned. The connectors will pierce the cable insulation and make contact with the wire inside – no stripping wires needed. Make sure each connection is tight. (If your lights don’t have clip-on connectors, you may need to strip the cable and use weatherproof wire nuts, but many lighting kits are designed to simplify this process.)
Test the connections: Now plug in the transformer (or turn it on) to power up the system. Do this at dusk so you can see the results immediately. Check that all your lights come on. This is your chance to walk around and see if the placement and angles are right. Adjust the aim of spotlights, reposition path lights, etc., to get the effect you want. If a light doesn’t come on, turn off the transformer and double-check that connector – it might not be making contact, so try reattaching it.
Bury the cables: Once everything looks good and all lights are working, unplug the transformer again. Dig a shallow trench (about 6 inches deep is usually plenty) along the route of your cable and tuck the cable into it. Six inches of depth keeps it out of sight and safe from casual digging. Leave a little slack (a small loop of extra cable) near each fixture in case you need to reposition it in the future. Gently cover the cable with soil or mulch, patting it down so it’s hidden but not damaging the wire.
Stake in the fixtures: Now that the cables are buried, go ahead and mount your lights. Push the stake-mounted lights into the ground at the spots you decided on (use both hands and push straight down so they’re sturdy and upright). If a stake hits a rock or root, you may need to reposition slightly. For deck lights or other mounted fixtures, attach them according to the instructions (usually screws). Once installed, double-check the aim/direction of each light.
Set the controls: Many transformers come with built-in timers or light sensors. If yours does, set the timer for when you want the lights to come on and off (for example, dusk to midnight). If it has a photocell, it might turn on automatically at dusk. Alternatively, plug the transformer into a smart outdoor outlet that you can control with your phone or voice assistant. The goal is that your lights operate automatically on a schedule, so you don’t have to remember to flip any switches.
Power on and enjoy: Plug the transformer back in and make sure all lights are on as scheduled. Do a final walk-through at night to see the finished product. You might notice a few small tweaks to make – perhaps angling a light a bit more here or there to avoid glare or highlight something better. Tweak as needed. Then pat yourself on the back, because you’ve just installed your own landscape lighting system!
A note on solar lights: If you opt for solar landscape lights, the “installation” is much simpler: just place the lights in sunny spots and turn them on (no wiring required). Solar lights charge in the daytime and come on automatically at night. They’re great for those far corners of the yard where running wire is impractical.
The downside is they’re generally dimmer and only last a few hours into the night (depending on how much sun they got). Still, they can be a quick and easy addition for accent lighting or markers along a path. Just remember to position the solar panels where they’ll get sun, and wipe them clean occasionally so they can charge well.
Hiring a Professional for Landscape Lighting
Sometimes it’s best to call in the pros. If you have a large landscape or a complex design in mind, a professional landscape lighting contractor or designer can deliver a truly high-end look with precise light placement and top-quality fixtures. Professionals are skilled at avoiding common issues like glare or dark spots. They also handle the more complex aspects: trenching cables, safely connecting to your home’s electrical system, and installing line-voltage lights (the 120V kind often used for powerful uplights), which in many areas must be done by a professional technician.
Also, if you’re considering integrating your outdoor lights with a smart home system, security system, or syncing them with other landscape features (like pond fountains or music systems), a pro can make sure all those components work seamlessly together. They stay up-to-date on the latest tech and options, so you can get features like smartphone controls, color-changing lights, or whatever high-tech idea you fancy, all properly set up.
On the flip side, hiring a pro will cost more – you’re paying for design expertise, labor, and often higher-grade materials. But wait… many homeowners feel it’s worth it when they see the stunning result without having to lift a finger themselves. A skilled designer can choose optimal beam spreads, color temperatures, and fixture styles that truly flatter your home. They often have access to fixtures that aren’t sold in big-box stores, so you might get a more unique or durable product.
In summary, do it yourself for smaller projects or if you enjoy the hands-on aspect. Call the landscape or outdoor lighting experts if you have a large property, want a dramatic designer look, or just prefer not to deal with the installation. There’s no shame in either approach – the goal is to end up with a beautifully lit yard that brings you joy.
Maintaining Your Landscape Lighting
Once your lighting is in, you’ll want to keep it looking and performing great for years to come. Luckily, maintenance isn’t too hard if you stay on top of it. Here are some simple tips:
- Keep lights clear: Clean the fixtures every few months (wipe off dirt, water spots, or bug debris from lenses) so they shine bright. Also trim back any plants or grass growing over or crowding your lights, and keep solar panels (if any) free of leaves.
- Inspect and tune-up: Every so often, especially after storms, walk your yard to check that lights are upright and working. Fix any wobbly stakes or exposed wires. If a bulb is out or dim, replace it promptly (LEDs last long, but halogens burn out more). While you’re at it, adjust any fixtures that might have been bumped or that need re-aiming as your plants grow.
- Seasonal protection: In fall, clear away leaves that pile on your lights. If you get snow, mark where lights are before the first snowfall so you don’t hit them with a shovel or snowblower. After heavy snow or ice, gently brush off fixtures to prevent damage. Taking a little care in rough weather will keep your system running well.
These small maintenance moves will protect your investment and keep your yard shining bright. Plus, it’s a nice excuse to walk around your garden and admire the view every so often!
Conclusion: Let Your Home Shine Bright
A thoughtfully lit landscape can completely transform your home’s look and feel. It goes from a dark, unused yard to an enchanting extension of your living space. The best part? You don’t have to be a lighting designer to achieve a beautiful effect (though now you know quite a few of their tricks!).
Whether you start small with a couple of path lights and a spotlight on your favorite tree, or go all out with a full lighting system, you’ll notice the difference immediately. Your home will feel more inviting, you’ll feel safer walking around at night, and maybe you’ll even discover new favorite outdoor hangout spots that you used to avoid after sundown.
Ready to get started? Picture your ideal nighttime yard, choose the right time to begin, or connect with a landscape lighting professional to bring your vision to life. Let your home shine bright and reveal the beauty that’s been hiding in the dark. You’ve got the knowledge—now it’s time to give your outdoor spaces the glow-up they deserve!
Frequently Asked Questions about Landscape Lighting
Q: How expensive is it to install landscape lighting?
A: Costs can vary widely. A small setup with a transformer and a few lights might start at a few hundred dollars. For a full front-and-back yard design with high-end fixtures installed by a professional, the price could reach several thousand dollars. The good news is that once installed, operating costs are typically low—especially when using energy-efficient LED bulbs. Start with what fits your budget—you can always expand your lighting setup over time.
Q: How far apart should I space path lights?
A: A good rule of thumb is about 6 to 8 feet apart, but it depends on the brightness of the lights and your personal preference. You want overlapping pools of light for consistent coverage, but not so close that it looks like one continuous runway. If your path lights are dimmer or lower, you might place them closer (around 6 feet). If they’re brighter or have a widespread, you can space them further apart (8 to 10 feet). Remember, the goal is a guiding glow, not an airport runway.
Q: Can I install landscape lighting on my own?
A: In many cases, yes. Low-voltage landscape lighting systems are designed to be straightforward and user-friendly. There’s no need for complex electrical work or running conduit—most setups involve laying out cables, connecting fixtures using provided connectors, and plugging a transformer into a standard outlet.
If you’re comfortable using basic tools and following instructions, handling a small to medium-sized lighting setup is entirely manageable. For larger or more intricate designs—or if you’re unsure about any step—it’s a good idea to consult a professional to ensure the installation is safe and effective.
Q: What’s the difference between low-voltage and solar lights?
A: Low-voltage lights are wired into a system that uses a transformer to reduce your household current down to 12 volts. They reliably shine every night (as long as they have power) and tend to be brighter and more durable. Solar lights have no wires – each has its own little solar panel and battery, charging up during the day and automatically coming on at night.
They’re super easy to install (just stick them in the ground), but their brightness and how long they last at night depend on how much sun they get and the quality of the light. Many people use a mix: wired low-voltage lights for primary lighting where you want consistent brightness, and a few solar lights in spots where wiring is tough or just as extra accents.
Q: Will outdoor lighting increase my electric bill a lot?
A: With modern efficient lights, most homeowners barely notice a change in their electric bill. If you’re using all LED bulbs, the energy consumption is very low. For instance, ten LED landscape lights might use around 40 watts total (that’s like leaving one traditional light bulb on). Even running them a good part of the night, it’s just a few kilowatt-hours per month – only a few dollars on your bill. Using timers or motion sensors can keep usage even lower. So, you can enjoy a beautifully lit yard without worrying about energy costs.